Harriers vs Mirages: The Aerial Duels of the Falklands War
The 1982 Falklands War between Britain and Argentina was not just a battle for territory—it was also a test of air power. At the heart of this aerial contest were the British Harrier jump jets and Argentina’s Mirage fighters. These aircraft, each with distinct strengths and weaknesses, clashed in some of the most intense dogfights of modern aerial warfare.
A Tale of Two Fighters
The British deployed two primary aircraft in the Falklands: the Harrier GR.3 (used by the RAF) and the Sea Harrier FRS.1 (operated by the Royal Navy). The Harrier was renowned for its Vertical/Short Takeoff and Landing (V/STOL) capability, which allowed it to operate from aircraft carriers without the need for catapults or arrestor hooks. Equipped with Blue Fox radar, Sidewinder AIM-9L missiles, and superior agility, the Sea Harrier was a formidable dogfighter.

Argentina, on the other hand, relied heavily on the Dassault Mirage III, a delta-wing jet designed for high-speed interception. Additionally, they operated the IAI Dagger, an Israeli-built variant of the Mirage 5. These aircraft were fast and powerful, but they were optimised for high-altitude combat rather than low-level dogfighting.
The First Clashes: British Superiority
One of the key advantages the British Harriers had over the Argentine Mirages was radar-guided air-to-air combat. The Royal Navy’s Sea Harriers, supported by shipborne radars, had better situational awareness. Additionally, their Sidewinder AIM-9L missiles were all-aspect seekers, meaning they could lock onto enemy aircraft from any angle, not just from behind.
On the other hand, the Argentine Mirages and Daggers faced a significant disadvantage. They lacked modern Beyond-Visual-Range (BVR) weapons, forcing them to rely on older Matra R530 missiles, which required a favourable firing position. Moreover, due to the lack of aerial refuelling, Argentine jets had limited combat endurance over the islands, restricting their effectiveness.
Dogfights Over the South Atlantic
The first major aerial clash occurred on May 1, 1982, when Argentine Mirages engaged British Harriers. In a now-famous engagement, a pair of Mirage III jets attempted to attack Sea Harriers from 800 Naval Air Squadron (NAS). However, the British pilots, using superior radar and missiles, managed to outmanoeuvre their Argentine adversaries.
Lieutenant Commander Mike Watson and Lieutenant Commander Paul Barton successfully engaged two Mirages. One was shot down by a Sidewinder, while the other, attempting to evade, ran out of fuel and crashed in Argentina. This engagement set the tone for the rest of the war—Harriers outclassed the Mirages in close-range dogfighting.
The Falklands War Dogfights and the 23:0 Kill Ratio
During the Falklands War (1982), the British Sea Harriers achieved a remarkable kill ratio of approximately 23:0 in air-to-air combat against Argentine aircraft. Here’s a breakdown:
British Successes
- Sea Harriers shot down 20 Argentine aircraft using AIM-9L Sidewinder missiles and cannon fire.
- This included Mirage III, Dagger (Israeli-modified Mirage 5), A-4 Skyhawks, and Pucaras.
- They also downed three helicopters.
Argentine Successes
- No Sea Harriers were lost in air-to-air combat.
- However, the Argentines did manage to destroy 6 Harriers (4 Sea Harriers and 2 GR.3s) using surface-to-air missiles (SAMs) and ground fire.
Why Did the Harriers Dominate?
- AIM-9L Sidewinders: The all-aspect infrared homing capability allowed Harriers to fire from any angle.
- Superior Tactics: The British pilots used energy-conserving dogfighting techniques against the swift but less manoeuvrable Mirages and Daggers.
- VTOL Advantage: The Harrier’s ability to “viff” (Vectoring in Forward Flight) made them highly manoeuvrable in close combat.
- Lack of Argentine BVR (Beyond Visual Range) Capability: The Mirage III’s Matra R530 missile was ineffective compared to the AIM-9L.
The British air superiority ensured Argentine pilots had to operate at extreme risk, making daring low-altitude raids instead of engaging in direct dogfights.
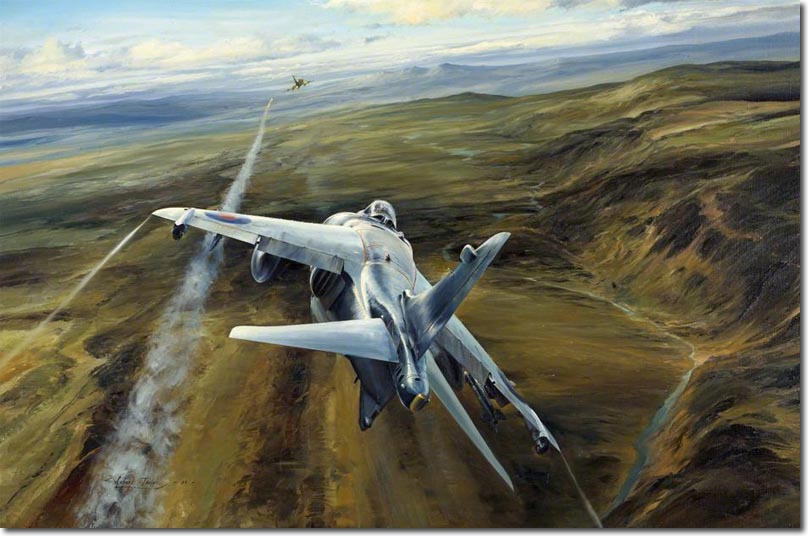
The Harrier’s Edge: Agility and Missiles
One of the defining features of the Harrier was its ability to “Viff” (Vectoring in Forward Flight). This unique technique allowed pilots to use the aircraft’s thrust-vectoring nozzles to make abrupt turns and outmanoeuvre enemy jets—something traditional fighters like the Mirage simply could not counter. In contrast, the Mirage III’s delta-wing design meant it had a wide turning radius, making it vulnerable to Harrier pilots who could engage in close-range combat.
Furthermore, the AIM-9L Sidewinder missile demonstrated revolutionary capabilities. Unlike previous models, it could lock onto enemy aircraft in any direction, making defensive manoeuvres less effective. The Argentine pilots soon learnt that attempting to engage the Harriers was often a suicidal endeavour.

Limitations of the Argentine Air Force
Despite their bravery, Argentine pilots faced several tactical disadvantages. Most critically, their Mirages were not designed for low-altitude combat, and due to fuel constraints, they had only a few minutes of effective engagement time before having to return to base. This severely restricted their ability to mount sustained air campaigns.
Furthermore, the Harriers benefited from British electronic warfare and radar coverage from warships, which gave them an early warning advantage and enabled them to choose their battles carefully, avoiding surprise attacks.
Lessons from the Conflict
By the end of the war, the Harrier force had achieved an astonishing kill-to-loss ratio. British Harriers shot down more than 20 Argentine aircraft, including Mirages, Daggers, and Skyhawks, while suffering only a few combat losses—most of which were due to ground-based anti-aircraft fire rather than enemy fighters.
The Falklands War highlighted the importance of training, tactics, and technology in aerial combat. The training of British pilots in dogfighting, as opposed to interception, gave them a crucial advantage over their Argentine counterparts. Additionally, the Harrier’s design, coupled with advanced missiles, ensured that even against faster, higher-flying Mirages, they remained dominant.
Conclusion
The conflict between the Harriers and Mirages during the Falklands War serves as a prime example of how superior tactics, training, and technology can surmount numerical or speed disadvantages. The Harrier’s agility, missile capability, and ability to operate from aircraft carriers gave Britain a decisive aerial edge. Meanwhile, the Mirages, although formidable on paper, struggled against the realities of combat in the South Atlantic.
The Falkland War remains one of the most studied conflicts in modern military history, and the air battles fought over the islands continue to be analysed by military strategists worldwide. The Harrier’s success solidified its reputation as one of the most effective fighter jets ever built, while the Argentine experience highlighted the limitations of relying solely on speed and firepower without sufficient support systems.
Ultimately, Harriers ruled the skies over the Falklands, ensuring British air superiority and playing a key role in securing victory.
References:
- Imperial War Museums (IWM) – www.iwm.org.uk
- Royal Air Force (RAF) History – www.raf.mod.uk
- Argentine Air Force Official Site – www.faa.mil.ar
- The Falklands War 1982: Official Reports – www.nationalarchives.gov.uk
- Air Combat Information Group (ACIG) – www.acig.org